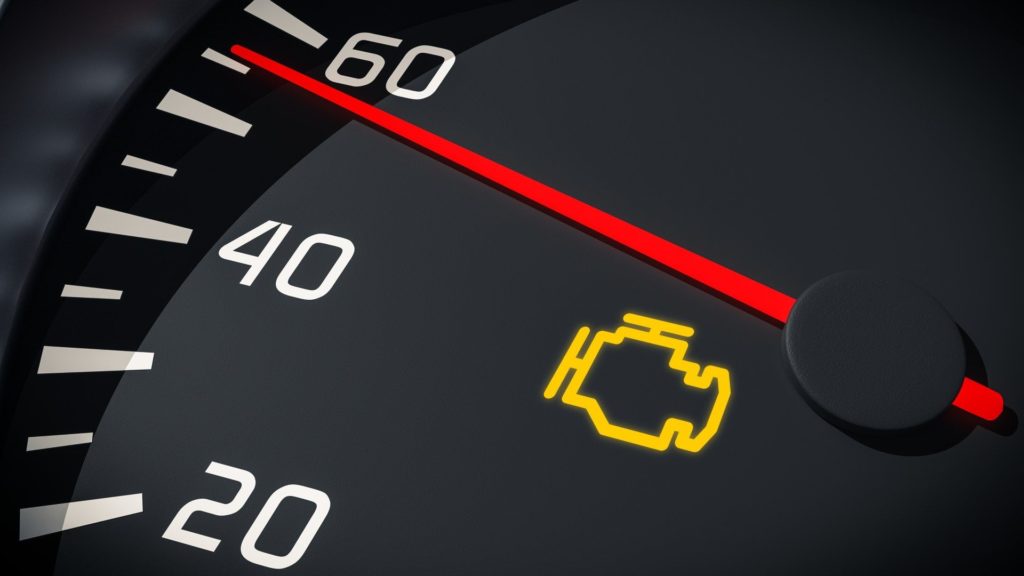
An automobile’s Check Engine Light is one of the most misunderstood indicators on a vehicle and it often creates confusion for drivers that can lead to stress, or even panic, when it illuminates unexpectedly. Is this a serious problem? Should I pull over immediately? How do I figure out what’s really wrong? How much is this problem going to cost me to fix? Is this going to seriously interrupt my life?
We want to help you avoid that terrible sinking feeling the next time the light flashes on by giving you the lowdown on everything you need to know about diagnosing a ‘check engine’ indicator light. In this article, we will explain what a check engine light is, cover how to determine if it is related to a serious issue, review the most common causes that trigger a CEL, and guide you through the steps you can take to diagnose and repair the problem on your own.
What is a Check Engine Light (CEL)?
A check engine light is a signal from a car’s computer to alert the driver that something is wrong. Most formally known as a malfunction indicator lamp, these warning lights can be yellow, amber or orange in color and may say things like “Check Engine” or simply display an engine icon. It is always best to familiarize yourself with all of your vehicle’s indicator lights by reading the owner’s manual prior to operation. CEL’s are not to be confused with “Service Req’d” or similar indicators, which indicate that your vehicle is due for scheduled maintenance based on time or mileage, most commonly giving a reminder that it is time for an oil change.
These warning lights first became standardized in 1996 when new regulations were passed that required automobile manufacturers to adopt a standardized list of trouble codes and a universal style of interface with the computer’s onboard diagnostic information. This universal protocol and connector type, known as OBD-II, usually has its connection port located under the steering column in a relatively easy to access location. Prior to 1996, manufacturers each had their own engine diagnostic systems, often requiring more specialized knowledge and tools.
What does it mean when the Check Engine Light turns on?
A Check Engine Light is simply an indicator that a vehicle sensor has identified that something on your car is operating outside the predefined normal parameters. This could be an issue as minor as your gas cap being loose, or could indicate much more serious trouble with the engine’s health. When a CEL turns on, this is your signal to heed caution, pay extra close attention to your car’s behavior, and then to investigate the cause further – ideally with the help of a competent mechanic.
How can I tell if the problem is serious?
The simplest way to determine if a Check Engine Light requires immediate attention is whether the indicator light is flashing or not. If the warning light is flashing, it indicates a more serious problem that could cause damage or pose a safety concern if left unaddressed. Potential causes for a flashing check engine light include issues like an engine misfire, an engine part failing, or a problem with your exhaust system. If your Check Engine Light is flashing, you should pull over immediately, turn off the car and see if you can identify an obvious cause of the problem. If after checking over the vehicle there are no other apparent symptoms or warnings from other gauges, you can try turning the car on again to see if the blinking light returns. If it does, it is safest to turn the vehicle back off immediately and arrange for a tow.
How do I figure out what’s causing a Check Engine Light?
Once a Check Engine Light turns on in your vehicle, the next step in diagnosing the problem is to pull the specific trouble codes from the car’s computer. Using the standardized OBD-II port under the steering column, you can connect to the car with an OBD-II Scanner (sometimes called a ‘Reader’) that plugs into the connection port. Any mechanic will have one available to help you pull the code(s), or often AutoZone or other auto parts stores will have one that they’ll let you use for free. You can also purchase an OBD-II reader (many are now bluetooth enabled and connect with an app on your smartphone), which is a handy tool you can use with all of your vehicles made after 1996.
Using the scanner connected to the OBD-II port, when you turn on the vehicle and follow the device’s instructions to read the trouble codes, the reader will then scan the diagnostic information and present you with specifically formatted codes, such as “P0420”. While these are standardized codes that indicate an overall problem area or symptom, you will then most likely then need to do some research online, or by talking to a local mechanic, and reference that trouble code against the year, make and model of your vehicle to find out the most common specific causes. Many owners at this point will feel more comfortable handing off their car to the pros, but DIYers may be able to more quickly and cheaply solve the issue on their own, if it is not serious. An OBD-II reader provides car owners with one more data point to help them talk with their mechanic and it gives them a better shot at avoiding costly or unnecessary auto repairs.
Mixed Signals & Depth of Information
Even with a specific trouble code in hand, keep in mind that you do not have an exact description of, or answer to, the underlying problem. These codes simply give you a better idea of where to start looking for the actual problem and sometimes a code might be triggered by something different from what the code readout states.
Some manufacturers utilize their own proprietary devices to connect to their vehicles which provide much richer detail than the universal OBD-II readers, particularly on newer car models. Owners may want to reach out to a specialized mechanic or dealership if you hit a dead end with a universal OBD-II scanner.
On occasion, the check engine light might even come on when nothing is actually wrong with the car. It could be related to a temporary problem caused by a change in humidity or other factors. In such cases, the light should go off by itself after a short time.
How to Turn Off a Check Engine Light
Most OBD-II readers will allow you to turn off or reset the check engine light. However, it is very important to be aware that this action alone does not actually repair the problem. In most cases, the light will simply come back on after a certain amount of driving time or distance covered. Otherwise, the light will turn itself off once the appropriate repair has been made and the vehicle has been driven for a sufficient amount of time or distance for the computer to re-run the relevant diagnostic checks. This diagnostic testing time/mileage will vary depending on the problem and specific vehicle.
What are the Most Common Causes for a Check Engine Light to Come On?
CarMD, an automotive telematics company, published a list of the 10 most common check engine codes in 2018:
- Replace O2 sensors
- Replace ignition coils and spark plugs
- Replace catalytic converter
- Inspect fuel cap and tighten or replace
- Replace evaporative emissions purge solenoid
- Replace mass airflow sensor
- Replace ignition coils
- Replace evaporative emissions purge solenoid
- Replace fuel injectors
- Replace thermostat
It’s almost a cliché at this point, but one of the first things to check if a steady Check Engine Light comes on is to make sure the gas cap is screwed on tightly. A loose gas cap will trigger an error message to the car’s computer as a leak in the vehicle’s vapor recovery system, which is part of a car’s emissions system. If it turns out that the fuel cap is indeed loose, tighten it up and continue driving. It may take a little time for the relevant diagnostics to confirm the ‘fix’, but hopefully the light will then go off on its own.
Heed The Warning
It’s not surprising that some people become worried and stressed when they see the check engine light come on. You may even know someone who prefers to ignore the problem altogether by just putting a piece of tape over the light on the dashboard and pretend it never happened. It cannot be overstated that this is the wrong approach, as the issue is very unlikely to resolve itself and you are increasing the chances of further damage and more expensive repairs down the road. Staying calm, logical and rational is the best approach to deal with a Check Engine Light when it arises.
Some drivers with older vehicles may be tempted to try to squeeze every last ounce out of their car before visiting a local mechanic for a service. Odds are that this attempt at a money saving strategy will only work for so long, later requiring more serious and expensive work to keep the vehicle roadworthy.
It is also important to note that Check Engine Lights can offer a general indicator of overall vehicle health. If warning lights are popping up with increasing frequency, it may be a sign that your vehicle has parts wearing out and you should become more vigilant with your service intervals and inspections.